In this guide, you’ll learn how to install and configure Nginx with HTTPS and PHP-FPM on an Ubuntu server. This setup provides a reliable, secure, and high-performance foundation for hosting dynamic web applications. By combining Nginx’s efficient request handling with PHP-FPM’s optimized script execution and HTTPS for encrypted traffic, this architecture supports modern web hosting demands with ease.
Why Nginx + PHP-FPM + HTTPS?
Let’s explore what makes this stack ideal for production hosting:
- Nginx: Blazing-fast static file handling and efficient concurrency. It excels at serving cached or static resources like images, CSS, and JavaScript files — crucial for fast frontends and reduced load on dynamic backends. It also allows for asynchronous request handling, which improves concurrency.
- PHP-FPM: Tunable, pool-based PHP process manager. It allows you to optimize PHP execution per project by configuring separate pools, enabling fine-grained control over resource allocation. This is especially important when hosting multiple installations that each require isolated runtime environments.
- HTTPS (Let’s Encrypt): Free, automated, and trusted encryption. Ensures all communication between client and server is encrypted, improves SEO, and satisfies browser security requirements. It also enhances user trust and prevents man-in-the-middle attacks.
- FastCGI Caching: Full-page caching for anonymous traffic. This significantly decreases server load and accelerates delivery for users who are not logged in, making it ideal for content-heavy websites. This is particularly useful for SEO and visitor experience.
- Security Best Practices: Hardened access to sensitive files. Prevents common vulnerabilities by restricting access to configuration files, admin panels, and sensitive endpoints across different platforms.
Prerequisites
Before you install and configure Nginx with HTTPS and PHP-FPM, make sure your system is running Ubuntu 20.04 or 22.04 LTS. These long-term support versions are stable, secure, and compatible with the tools required for this stack. Make sure your server has a public IP address and that you have access via SSH. You should also register a domain name and configure its DNS A record to point to the server’s IP address. This is essential for enabling HTTPS later.
Always avoid working directly as the root user. Instead, create a user with administrative privileges using the sudo command. This improves security and reduces the risk of unintended system-wide changes. Once connected via SSH as your sudo-enabled user, start by updating the system’s package index and upgrading any outdated packages:
sudo apt update && sudo apt upgrade -yInstall essential utilities that will be needed throughout the process:
sudo apt install curl wget unzip -yThese tools allow you to download files, extract archives, and manage repositories more efficiently.
Step 1: Install Nginx for Your PHP-FPM + HTTPS Stack
Nginx is a high-performance, asynchronous web server that is ideal for both static and dynamic content. To install it, run:
sudo apt install nginx -y
sudo systemctl enable nginx
sudo systemctl start nginx
You can verify that the server is running using:
systemctl status nginx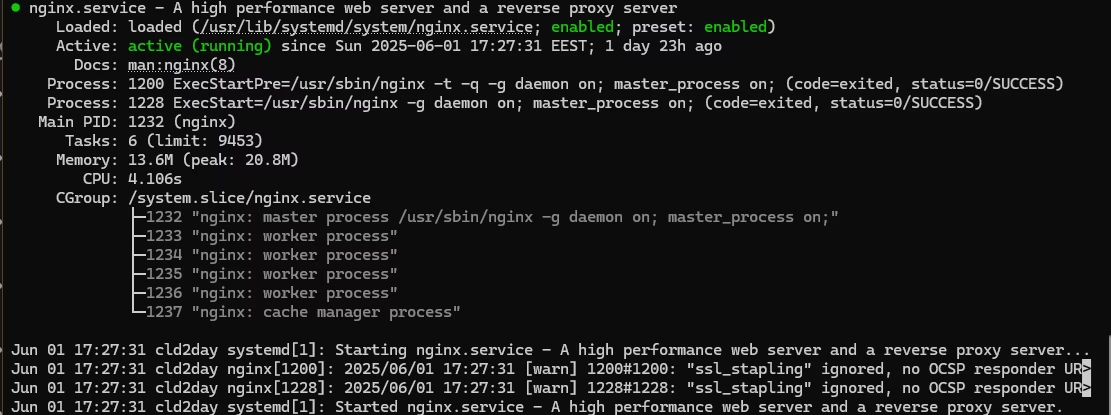
If the server is active and running, opening your server’s IP address in a browser should display the default Nginx welcome page.
Step 2: Install PHP-FPM after Nginx Setup
Dynamic content handling is delegated to PHP-FPM, which manages pools of worker processes to execute PHP scripts. It’s more efficient than traditional CGI models because it keeps workers alive between requests.
To install PHP-FPM and common extensions that support various functionalities, run:
sudo apt install php-fpm php-mysql php-cli php-curl php-mbstring php-xml php-zip php-gd php-bcmath -yOnce installation is complete, verify the PHP-FPM service status:
sudo systemctl status php8.3-fpmReplace php8.3-fpm with the actual version installed if different. This ensures that the PHP process manager is active and ready to handle incoming PHP execution requests.

Enable HTTPS After You Install and Configure Nginx with PHP-FPM
To secure your server with SSL/TLS, Let’s Encrypt provides free, automated certificates through a tool called Certbot. This step is essential not only for encrypting communications but also for satisfying modern browser security requirements and improving user trust.
Prerequisites for Certbot
Before running Certbot, ensure the following conditions are met:
- A Publicly Registered Domain
You must own a valid domain name (e.g.,example.com) that is registered and accessible via the internet. - A Static Public IP Address
While dynamic IP addresses can technically work, a static IP is strongly recommended to avoid DNS resolution issues, especially for production environments. - Correct DNS Configuration
Your domain’s A (and optionally AAAA for IPv6) records should point to your server’s public IP. You can confirm this using tools likedigornslookup. - Open Firewall Ports
Port 80 (HTTP) must be open and reachable from the internet. Certbot uses this port to complete the HTTP-01 challenge issued by Let’s Encrypt. Port 443 (HTTPS) should also be open for the certificate to be used afterward. - Fully Qualified Domain Name (FQDN) in Nginx
Your Nginx configuration should reference the exact domain(s) you’re requesting a certificate for in theserver_namedirective. Mismatches will result in failed challenges. - Root or sudo Privileges
Certbot modifies Nginx configurations and manages system directories. It must be run as a sudo-enabled user or directly as root.
Once these prerequisites are met, you can proceed with the Certbot installation and certificate issuance process.
Install Certbot to manage free SSL certificates:
sudo apt install certbot python3-certbot-nginx -yWith your domain name configured and DNS pointing to your server, you can request and install a certificate with the following command:
sudo certbot --nginx -d yourdomain.com -d www.yourdomain.comCertbot will automatically modify your Nginx configuration to serve HTTPS traffic and obtain the SSL certificates. Once completed, you should be able to access your site via HTTPS.
To ensure automatic renewal of the certificates, run a test:
sudo certbot renew --dry-runLet’s Encrypt certificates are valid for 90 days, and Certbot installs a system timer or cron job to check and renew them as needed.
Configure Nginx for PHP Execution via PHP-FPM
With the web server and PHP-FPM installed and SSL in place, the next step is to configure Nginx to serve dynamic PHP content. Begin by creating a new site configuration file. Replace yourdomain.com with your actual domain:
sudo nano /etc/nginx/sites-available/yourdomain.com.confPaste the following optimized configuration:
### Example Nginx Configuration for HTTPS and PHP-FPM

# Redirect all HTTP traffic to HTTPS
server {
    listen 80;
    server_name yourdomain.com www.yourdomain.com;

    # Allow Let's Encrypt ACME challenge for SSL verification
    location /.well-known/acme-challenge/ {
        root /var/www/yourdomain.com/public_html;
        allow all;
    }

    # Redirect all other HTTP requests to HTTPS
    location / {
        return 301 https://yourdomain.com$request_uri;
    }
}

# Main HTTPS server block
server {
    listen 443 ssl http2;  # Enable SSL and HTTP/2 for better performance
    server_name yourdomain.com www.yourdomain.com;

    root /var/www/yourdomain.com/public_html;
    index index.php index.html index.htm;

    # SSL certificate files provided by Let's Encrypt
    ssl_certificate /etc/letsencrypt/live/yourdomain.com/fullchain.pem;
    ssl_certificate_key /etc/letsencrypt/live/yourdomain.com/privkey.pem;
    include /etc/letsencrypt/options-ssl-nginx.conf;

    # Enable OCSP Stapling for faster SSL handshakes
    ssl_stapling on;
    ssl_stapling_verify on;

    # Main location block – process requests
    location / {
        try_files $uri $uri/ /index.php?$args;  # Fallback to index.php with query string
    }

    # Handle PHP files via PHP-FPM using Unix socket
    location ~ \.php$ {
        include snippets/fastcgi-php.conf;  # Common FastCGI settings
        fastcgi_pass unix:/run/php/php8.3-fpm.sock;  # PHP-FPM socket
        fastcgi_param SCRIPT_FILENAME $document_root$fastcgi_script_name;  # Full path to script
        include fastcgi_params;  # Load standard FastCGI parameters
    }

    # Cache static assets for 30 days and disable logging to reduce disk usage
    location ~* \.(js|css|png|jpg|jpeg|gif|ico|svg|woff2?|ttf)$ {
        expires 30d;
        access_log off;
    }

    # Deny access to hidden files (e.g., .git, .env)
    location ~ /\. {
        deny all;
    }

    # Security headers
    add_header X-Frame-Options SAMEORIGIN;  # Prevent clickjacking
    add_header X-Content-Type-Options nosniff;  # Prevent MIME type sniffing
    add_header Strict-Transport-Security "max-age=31536000; includeSubDomains" always;  # Enforce HTTPS
}
Now create the root directory and a simple PHP file to test:
sudo mkdir -p /var/www/yourdomain.com/public_html
echo "<?php phpinfo(); ?>" | sudo tee /var/www/yourdomain.com/public_html/info.php
Enable the configuration and restart Nginx:
sudo ln -s /etc/nginx/sites-available/yourdomain.com.conf /etc/nginx/sites-enabled/
sudo nginx -t && sudo systemctl reload nginx
Visit https://yourdomain.com/info.php in your browser. If you see the PHP info page, your setup is working correctly.
Optimize PHP-FPM After You Install Nginx with HTTPS
Edit the php.ini file for proper tuning of PHP ensures that the server performs optimally under different workloads. Begin by editing the PHP-FPM configuration:
sudo nano /etc/php/8.3/fpm/php.iniModify or add the following values to suit common performance needs:
memory_limit = 512M
upload_max_filesize = 128M
post_max_size = 128M
max_execution_time = 300
max_input_time = 300
expose_php = Off

opcache.enable = 1
opcache.memory_consumption = 128
opcache.max_accelerated_files = 10000
opcache.revalidate_freq = 2
After making changes, restart PHP-FPM:
sudo systemctl restart php8.3-fpmThese values increase PHP’s memory and execution time limits, which can be critical for heavier applications or complex scripts.
When you install and configure Nginx with HTTPS and PHP-FPM, consider enabling HTTP/2 and gzip compression for better efficiency.
Verify Setup
Check PHP rendering and HTTPS:
It’s important to validate your setup from both a browser and terminal perspective. Browser access ensures your site is serving pages correctly to end users and rendering PHP as expected over HTTPS. Meanwhile, terminal testing using tools like curl helps confirm HTTP response headers, cache behaviors, and SSL certificate negotiation in a lightweight, scriptable way. In production environments, both methods provide essential diagnostics — helping detect misconfigurations early and ensuring that user-facing traffic is handled as intended.
curl -I https://yourdomain.comLook for:
HTTP/2 200 OKX-FastCGI-Cache: HITorMISS
Conclusion
You’ve now completed a full setup of a modern web server using Nginx, PHP-FPM, and HTTPS. From initial server preparation to package installation, HTTPS activation, and performance tuning, this guide has covered all essential components in a structured and practical way.
This stack offers both security and efficiency. Nginx handles static file delivery and request management; PHP-FPM provides optimized script execution; and Let’s Encrypt ensures encrypted communication with zero cost. With proper configuration, this foundation is suitable for a variety of use cases — from simple websites to large, dynamic applications.
To extend this setup further, consider adding monitoring tools like Netdata, Prometheus, or integrating firewalls and fail2ban for enhanced security. For scaling, reverse proxy strategies or containerization with Docker can help distribute workloads more effectively.
You now have a reliable and secure hosting environment — ready to deploy and scale.
References and Further Reading
- Official Nginx Documentation
The primary resource for Nginx configuration, performance tuning, and module usage. - PHP-FPM Configuration and Tuning Guide
Explains in detail how PHP-FPM works and how to configure worker pools and performance settings. - Let’s Encrypt Documentation
Learn more about how Let’s Encrypt works, including ACME protocols and certificate management. - Certbot Official Website
Find tailored Certbot instructions based on your OS and web server combination. - Ubuntu Server Guide – Web Servers
Ubuntu’s official documentation for installing and managing web servers on Ubuntu LTS systems. - Hardening Your Nginx Server
Mozilla’s best practices for improving web server security, including TLS recommendations.